I’ve lately been interrested (or perhaps obsessed is a better word) with Print and Play games, which as you might know involves making your own board game from digital files that you print out.
And one thing you need when the game is finished is some way to store it. Thus I’ve started making my own game boxes. And they look pretty darn good too, I think.
I recently finished making the game “The Voayages of Marco Polo”, and decided to document how I build my boxes in case other people want to know how to do this.
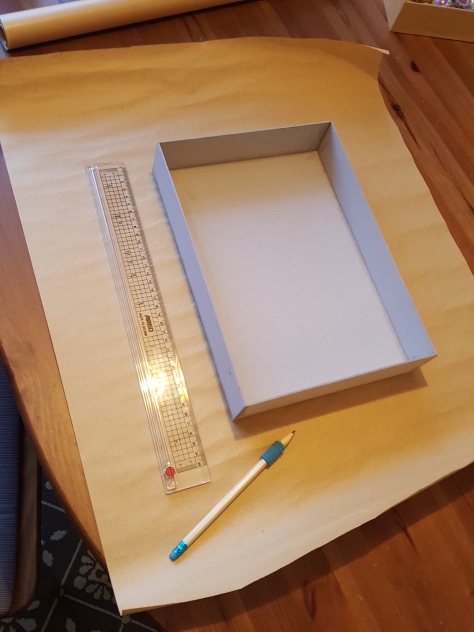
These are the materials I use:
– 2mm thick grayboard / chipboard
– Some kind of paper to “clothe” the box
– Masking tape
– Wood glue / PVA glue
– Spray on glue
In addition I use a metal ruler and rotary blade or knife to cut the cardboard, a plastic ruler and a pencil to mark out measurements, a scissor to cut the paper and some upbeat music. :)
The first thing you’ll need is to make the bottom of the box. It’ll need to be a little larger than the board that’s going inside, but exactly how large is up to you. You’ll need four pieces:
– The bottom
– Two long-side pieces
– Two short-side pieces
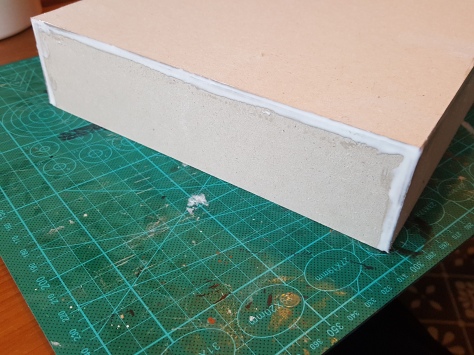
The height of the side pieces will depend on your game, but should be the same for all four sides.
For my game I went with a bottom size of 300mm x 210mm. The long-side pieces were the same length, 300mm. The short-side pieces I made 4mm shorter than the short side of the box to compensate for the thickness of the long-side pieces, so the ended up 206mm long. All side pieces I made 50mm high.
Unfortunately I forgot to take pictures of measuring and cutting these bits, but that’s so straightforward that I think you’ll manage on your own. Besides, you can see the bits below as I piece them together. ;)
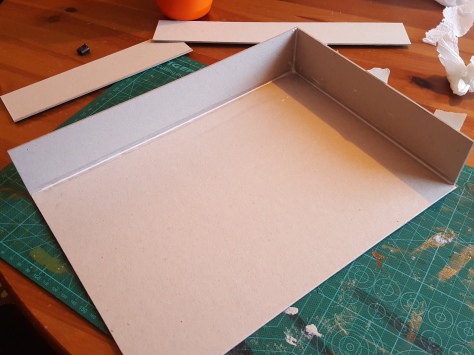
The next step was to attach the sides to the bottom. I used four small pieces of masking tape on the underside of the bottom piece along one of the long sides, letting them stick a bit out with the sticky side up.
I then took a long-side piece, spreading glue along one long side before sticking it down on the bottom piece at the edge. I flipped the four pieces of masking tape up onto the side piece, securing it in place. Along the inside I put down a small line of glue, using a finger to really get it into the corner.
The next step is getting the short sides pieces into place. The process is the same, except that I add a bit of masking tape to the side of the long side piece as well, and use glue on the edge that buts into the already attached side piece.
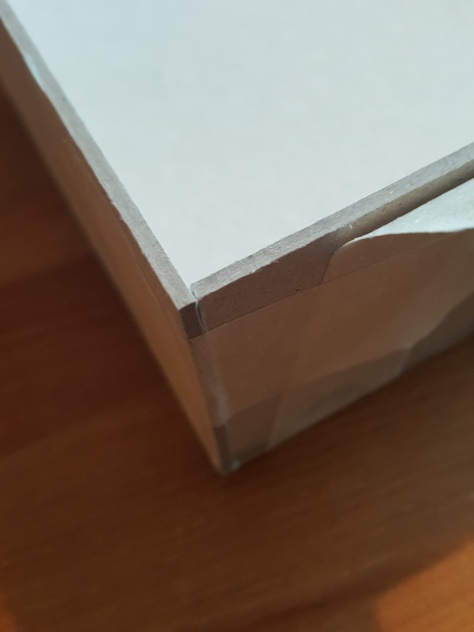
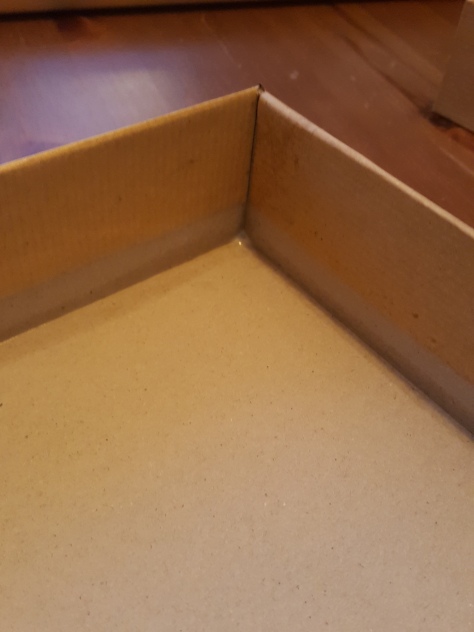
Here you can see the reason I keep the short-side pieces shorter than the short edge of the bottom. This way I get a nice square corner with no part of the sides outside the box piece.
I keep on doing this until all the sides are glued and taped into place.

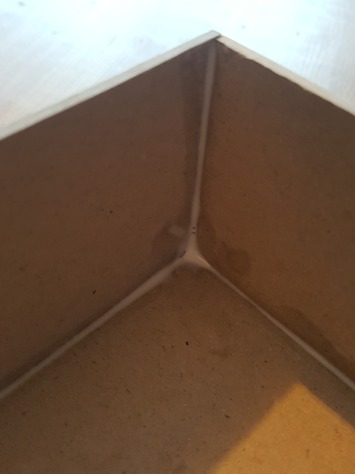
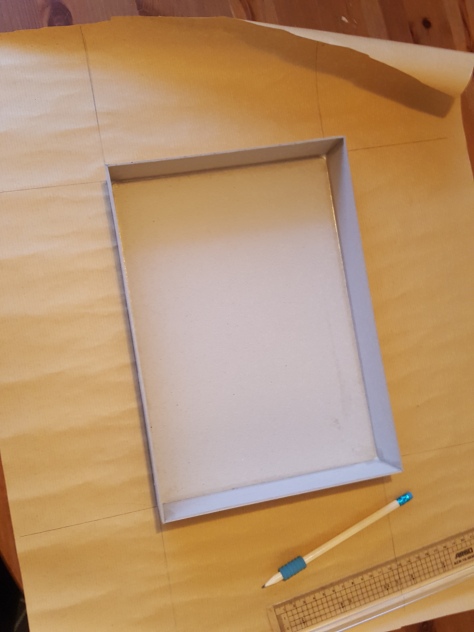
Once the glue has dried (or at least mostly dry) I remove the masking tape. I then go along the outside of the box and apply some glue to all the plces where two pieces of cardboard meet, smoothing it out with a finger.

The reason I do this is to give a little bit of extra strength, making the box sturdier.
Now for the fun part. ^_^
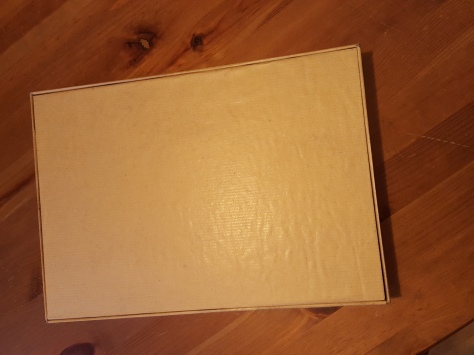
Once the box is completely dry (takes about 1 hour) I’m ready to wrap it up to make it look a little better. You can use whatever materials you prefer, be it contact paper, vinyl coverings, old tapestry or whatnot. I tend to use gray/brown book binding paper. Not only is it cheap and plentiful, but it can handle a scrach or two and has a fairly neutral color that meshes well with most decorations you might want to add later.
For this part you need a ruler and a pencil. Here you can see I’ve cut off a large sheet, ready to go. This paper rolls up like crazy, so I’ve rolled it the opposite way first, just to make it lie more flat on the table.
First I trace the box with the pencil. I’ll refer to these pencil lines as the “box shape” below. I then place the ruler along the edges and keep drawing lines out from all sides.
It is now time for some measurement…
Measure the height of the box sides +2mm out from the box shape and make a line there. The sides of my box are 50mm, so I measure 52mm out. I then make another line 40mm further out from the box (could be any distance you want, I just though this was a good distance for this project).
Do this for all four sides of the box shape.
Draw in “wings” on four of the sides if the short wall shapes. Take a look at the picture below and you’ll see what I mean. These don’t need to be uniform. I just eyeballed it and didn’t use the ruler.
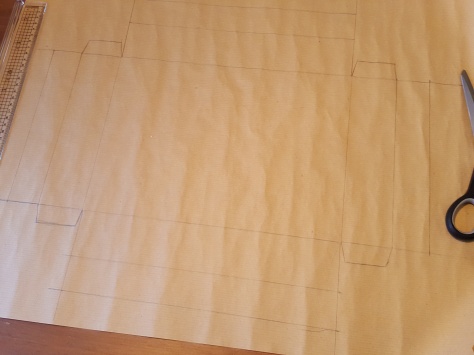
Now cut out the shape you’ve drawn.
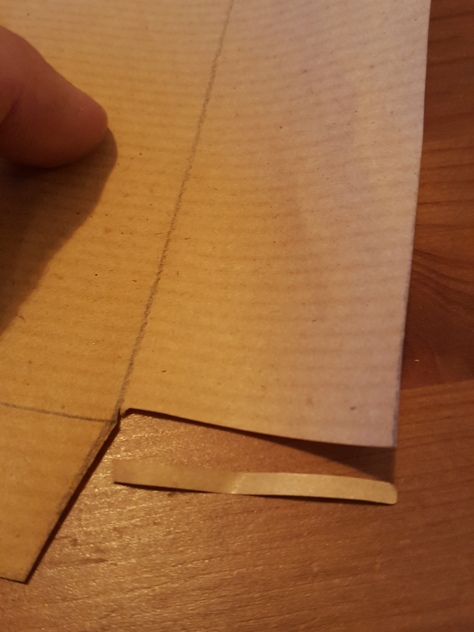
In addition I cut off a 2mm strip from the outer side of every outer box. This is the piece that will fold into the inside of the box, and if you leave these in there you’ll get creases in the corners, possibly making the lid hard to take on or off.
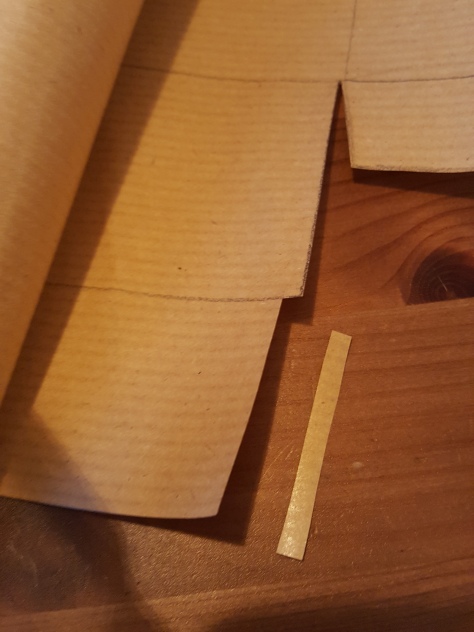
Here’s another piece cut off, this fron one of the short sides.
I now fold along all the pencil lines.
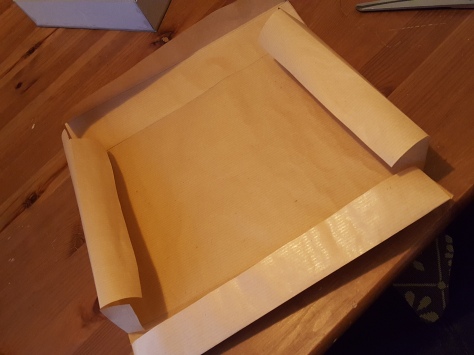
And just to be sure I haven’t made a complete mess of things I dry-fit the paper around the box. Looks good. :)
Now the messy bit…
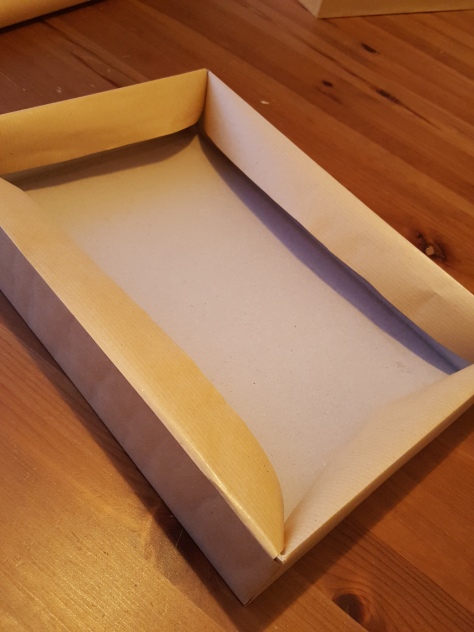
I take the paper outside and spray the inside with some spray-on glue.
I then take it inside, and carefully align the corners of the box so it sits perfectly into the box shape. I then smoot one of the short was of the paper to the box and fold the wings around the corner. The flap sticking up I fold inside and smooth into place. I do the same thing for the other short side, then finally the two long sides.
This is how it’ll look on the inside once done.
Now you repeat all that again for the box, but you need to make the top 5mm wider and longer, and the side pieces similarly longer. I also made the side pieces 2 mm higher to compensate for the difference in height.
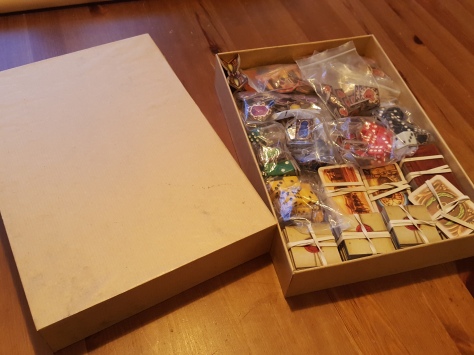
Once bothe pieces are done they fit perfectly. Here’s a shot from the underside. The lid slides smoothly into place and lifts easily, but doesn’t fall off easily.
Once done you can finish the box off however you wish. I plan on printing out the box cover of the retail game and glue it into place.
